Archive for the 'Linux' Category

Getting E17 Back with Multiple Monitor Support

Jun 05 2014 Published by under Linux

I have been using e17 for about a year. I haven’t encountered any bugs, and it’s definitely stable enough for daily usage. On upgrading e17 earlier this week to 0.17.6, I found the monitors to be handled separately. I considered this to be a regression in the software. I installed the upstream development version 0.18.7, since it was in the Portage tree to see if it fixed the problems. Other people had the same multiple monitor or dual-monitor problems with e18. I played around with the settings to no avail. Installing 0.17.5 again by editing the 0.17.6 ebuild didn’t help.
I decided to install the old 0.17.5 ebuild which is no longer in the Pportage tree. Upon close examination, EFL (Enlightenment Foundation Libraries) in the recent ebuilds replaced the separate packages used in the 0.17.5.ebuild.
In the 0.17.5.ebuild:

RDEPEND="
    pam? ( sys-libs/pam )
    >=dev-libs/eet-1.7.9
    >=dev-libs/efreet-1.7.9
    >=dev-libs/eio-1.7.9
    >=dev-libs/eina-1.7.9[mempool-chained-pool]
    || ( >=dev-libs/ecore-1.7.9[X,evas,inotify] >=dev-libs/ecore-1.7.9[xcb,evas,inotify] )
    >=media-libs/edje-1.7.9
    >=dev-libs/e_dbus-1.7.9[libnotify,udev?]
    ukit? ( >=dev-libs/e_dbus-1.7.9[udev] )
    enlightenment_modules_connman? ( >=dev-libs/e_dbus-1.7.9[connman] )
    enlightenment_modules_shot? ( >=dev-libs/ecore-1.7.9[curl] )
    || ( >=media-libs/evas-1.7.9[eet,X,jpeg,png] >=media-libs/evas-1.7.9[eet,xcb,jpeg,png] )
    >=dev-libs/eeze-1.7.9
    emotion? ( >=media-libs/emotion-1.7.9 )
    x11-libs/xcb-util-keysyms"

In the 0.17.6.ebuild:

RDEPEND="
    pam? ( sys-libs/pam )
    || ( >=dev-libs/efl-1.8.4[X,eet,jpeg,png] >=dev-libs/efl-1.8.4[xcb,eet,jpeg,png] )
    >=dev-libs/e_dbus-1.7.10
    ukit? ( >=dev-libs/e_dbus-1.7.10[udev] )
    x11-libs/xcb-util-keysyms"

I decided I had enough of the split screen methodology. One reason people don’t switch software is because they have to change the ways they interact with them. In my case, interacting with each monitor separately would lead to productivity loss while learning the new methodology and in the future. For example, the taskbar in the newer versions only show windows from one monitor. If I use two taskbars, I would have to keep track of where I put each window. User interfaces should get out of the way as much as possible so that users would not have to perform such unproductive chores.
Time to download the old ebuilds and rollback e17.

cd /usr/portage/x11-wm/enlightenment/
wget http://sources.gentoo.org/cgi-bin/viewvc.cgi/gentoo-x86/x11-wm/enlightenment/enlightenment-0.17.5.ebuild -O enlightenment-0.17.5.ebuild
ebuild enlightenment-0.17.5.ebuild digest
cd /usr/portage/x11-wm/enlightenment/
wget http://sources.gentoo.org/cgi-bin/viewvc.cgi/gentoo-x86/dev-libs/e_dbus/e_dbus-1.7.9.ebuild?revision=1.2 -O e_dbus-1.7.9.ebuild
ebuild e_dbus-1.7.9.ebuild digest
emerge -C dev-libs/efl
emerge =x11-wm/enlightenment-0.17.5

The general procedure is to download old ebuilds as necessary and remove packages that block other packages from being emerged. I went on to reinstall terminology, e17’s native terminal.

cd /usr/portage/x11-terms/terminology/
wget http://sources.gentoo.org/cgi-bin/viewvc.cgi/gentoo-x86/x11-terms/terminology/terminology-0.4.0_alpha1.ebuild?revision=1.2 -O terminology-0.4.0_alpha1.ebuild
ebuild terminology-0.4.0_alpha1.ebuild digest
emerge -pv =x11-terms/terminology-0.4.0_alpha1 | less
wget http://sources.gentoo.org/cgi-bin/viewvc.cgi/gentoo-x86/media-libs/elementary/elementary-1.7.9.ebuild -O ../../media-libs/elementary/elementary-1.7.9.ebuild
ebuild ../../media-libs/elementary/elementary-1.7.9.ebuild digest
emerge =media-libs/elementary-1.7.9
emerge -av =x11-terms/terminology-0.4.0_alpha1

Finally, to prevent future upgrades from undoing the work, mask newer versions of e17 and terminology in /etc/portage/package.mask/e17

>x11-wm/enlightenment-0.17.5
>x11-terms/terminology-0.4.0_alpha1
>=dev-libs/efl-1.9.4
>media-libs/elementary-1.7.9
>dev-libs/e_dbus-1.7.9

No responses yet

Btrfs RAID Setup

May 02 2014 Published by under Linux

We got a new server to be set up to build binary packages for DataMill. There was already RAID set up on it, and Linux automatically takes control of the disks. The first thing to do if you get errors such as unable to open /dev/sdb1: Device or resource busy or error checking /dev/sdc1 status: No such file or directory is to run fdisk to erase all partitions. Then reboot with parameters nodmraid nomdadm from your live CD, for example the System Rescue CD. After the reboot, I stopped the RAID controller and continued on with formatting.

root@sysresccd /root % cat /proc/mdstat
Personalities : [linear] [multipath] [raid0] [raid1] [raid6] [raid5] [raid4] [raid10]
md3 : active raid1 sda[0] sdb[1]
955692672 blocks [2/2] [UU]

unused devices:
root@sysresccd /root % mdadm --stop /dev/md3
mdadm: stopped /dev/md3
root@sysresccd /root % fdisk -l
Disk /dev/sda: 1000.2 GB, 1000204886016 bytes, 1953525168 sectors
Units = sectors of 1 * 512 = 512 bytes
Sector size (logical/physical): 512 bytes / 4096 bytes
I/O size (minimum/optimal): 4096 bytes / 4096 bytes
Disk identifier: 0x6ac24fb3
Device Boot Start End Blocks Id System
Disk /dev/sdb: 1000.2 GB, 1000204886016 bytes, 1953525168 sectors
Units = sectors of 1 * 512 = 512 bytes
Sector size (logical/physical): 512 bytes / 4096 bytes
I/O size (minimum/optimal): 4096 bytes / 4096 bytes
Disk identifier: 0x4de339dc
Device Boot Start End Blocks Id System
Disk /dev/sdc: 1000.2 GB, 1000204886016 bytes, 1953525168 sectors
Units = sectors of 1 * 512 = 512 bytes
Sector size (logical/physical): 512 bytes / 512 bytes
I/O size (minimum/optimal): 512 bytes / 512 bytes
Disk identifier: 0x52af89fe
Device Boot Start End Blocks Id System
Disk /dev/sdd: 15.5 GB, 15504900096 bytes, 30283008 sectors
Units = sectors of 1 * 512 = 512 bytes
Sector size (logical/physical): 512 bytes / 512 bytes
I/O size (minimum/optimal): 512 bytes / 512 bytes
Disk identifier: 0x0001d5e6
Device Boot Start End Blocks Id System
/dev/sdd1 * 1 30283007 15141503+ c W95 FAT32 (LBA)
root@sysresccd /root % fdisk /dev/sda
The device presents a logical sector size that is smaller than
the physical sector size. Aligning to a physical sector (or optimal
I/O) size boundary is recommended, or performance may be impacted.
Welcome to fdisk (util-linux 2.22.2).
Changes will remain in memory only, until you decide to write them.
Be careful before using the write command.
Command (m for help): n
Partition type:
p primary (0 primary, 0 extended, 4 free)
e extended
Select (default p):
Using default response p
Partition number (1-4, default 1):
Using default value 1
First sector (2048-1953525167, default 2048):
Using default value 2048
Last sector, +sectors or +size{K,M,G} (2048-1953525167, default 1953525167): +500M
Partition 1 of type Linux and of size 500 MiB is set
Command (m for help): n
Partition type:
p primary (1 primary, 0 extended, 3 free)
e extended
Select (default p):
Using default response p
Partition number (1-4, default 2):
Using default value 2
First sector (1026048-1953525167, default 1026048):
Using default value 1026048
Last sector, +sectors or +size{K,M,G} (1026048-1953525167, default 1953525167):
+2G
Partition 2 of type Linux and of size 2 GiB is set
Command (m for help): n
Partition type:
p primary (2 primary, 0 extended, 2 free)
e extended
Select (default p):
Using default response p
Partition number (1-4, default 3):
Using default value 3
First sector (5220352-1953525167, default 5220352):
Using default value 5220352
Last sector, +sectors or +size{K,M,G} (5220352-1953525167, default 1953525167):
Using default value 1953525167
Partition 3 of type Linux and of size 929 GiB is set
Command (m for help): p
Disk /dev/sda: 1000.2 GB, 1000204886016 bytes, 1953525168 sectors
Units = sectors of 1 * 512 = 512 bytes
Sector size (logical/physical): 512 bytes / 4096 bytes
I/O size (minimum/optimal): 4096 bytes / 4096 bytes
Disk identifier: 0x6ac24fb3
Device Boot Start End Blocks Id System
/dev/sda1 2048 1026047 512000 83 Linux
/dev/sda2 1026048 5220351 2097152 83 Linux
/dev/sda3 5220352 1953525167 974152408 83 Linux
Command (m for help): t
Partition number (1-4): 2
Hex code (type L to list codes): 82
Changed system type of partition 2 to 82 (Linux swap / Solaris)
Command (m for help): w
The partition table has been altered!
Calling ioctl() to re-read partition table.
Syncing disks.
root@sysresccd /root % sfdisk -d /dev/sda > part_table
root@sysresccd /root % sfdisk /dev/sdb < part_table
Checking that no-one is using this disk right now ...
OK
Disk /dev/sdb: 121601 cylinders, 255 heads, 63 sectors/track
Old situation:
Units: cylinders of 8225280 bytes, blocks of 1024 bytes, counting from 0
Device Boot Start End #cyls #blocks Id System
/dev/sdb1 0 - 0 0 0 Empty
/dev/sdb2 0 - 0 0 0 Empty
/dev/sdb3 0 - 0 0 0 Empty
/dev/sdb4 0 - 0 0 0 Empty
New situation:
Units: sectors of 512 bytes, counting from 0
Device Boot Start End #sectors Id System
/dev/sdb1 2048 1026047 1024000 83 Linux
/dev/sdb2 1026048 5220351 4194304 82 Linux swap / Solaris
/dev/sdb3 5220352 1953525167 1948304816 83 Linux
/dev/sdb4 0 - 0 0 Empty
Warning: partition 1 does not end at a cylinder boundary
Warning: partition 2 does not start at a cylinder boundary
Warning: partition 2 does not end at a cylinder boundary
Warning: partition 3 does not start at a cylinder boundary
Warning: partition 3 does not end at a cylinder boundary
Warning: no primary partition is marked bootable (active)
This does not matter for LILO, but the DOS MBR will not boot this disk.
Successfully wrote the new partition table
Re-reading the partition table ...
If you created or changed a DOS partition, /dev/foo7, say, then use dd(1)
to zero the first 512 bytes: dd if=/dev/zero of=/dev/foo7 bs=512 count=1
(See fdisk(8).)
root@sysresccd /root % sfdisk /dev/sdc < part_table
Checking that no-one is using this disk right now ...
OK
Disk /dev/sdc: 121601 cylinders, 255 heads, 63 sectors/track
Old situation:
Units: cylinders of 8225280 bytes, blocks of 1024 bytes, counting from 0

Device Boot Start End #cyls #blocks Id System
/dev/sdc1 0 - 0 0 0 Empty
/dev/sdc2 0 - 0 0 0 Empty
/dev/sdc3 0 - 0 0 0 Empty
/dev/sdc4 0 - 0 0 0 Empty
New situation:
Units: sectors of 512 bytes, counting from 0

Device Boot Start End #sectors Id System
/dev/sdc1 2048 1026047 1024000 83 Linux
/dev/sdc2 1026048 5220351 4194304 82 Linux swap / Solaris
/dev/sdc3 5220352 1953525167 1948304816 83 Linux
/dev/sdc4 0 - 0 0 Empty
Warning: partition 1 does not end at a cylinder boundary
Warning: partition 2 does not start at a cylinder boundary
Warning: partition 2 does not end at a cylinder boundary
Warning: partition 3 does not start at a cylinder boundary
Warning: partition 3 does not end at a cylinder boundary
Warning: no primary partition is marked bootable (active)
This does not matter for LILO, but the DOS MBR will not boot this disk.
Successfully wrote the new partition table

Re-reading the partition table ...

If you created or changed a DOS partition, /dev/foo7, say, then use dd(1)
to zero the first 512 bytes: dd if=/dev/zero of=/dev/foo7 bs=512 count=1
(See fdisk(8).)
root@sysresccd /root % mkfs.btrfs -d raid5 /dev/sda1 /dev/sdb1 /dev/sdc1
/dev/sda1 appears to contain an existing filesystem (btrfs).
Error: Use the -f option to force overwrite.
root@sysresccd /root % mkfs.btrfs -f -d raid5 /dev/sda1 /dev/sdb1 /dev/sdc1
SMALL VOLUME: forcing mixed metadata/data groups
ERROR: With mixed block groups data and metadata profiles must be the same
root@sysresccd /root % mkfs.btrfs -f -d raid5 /dev/sda3 /dev/sdb3 /dev/sdc3
Error: unable to open /dev/sda3: Device or resource busy
root@sysresccd /root % cat /proc/mdstat
Personalities : [linear] [multipath] [raid0] [raid1] [raid6] [raid5] [raid4] [raid10]
md3 : active raid1 sdb3[1] sda3[0]
955692672 blocks [2/2] [UU]

unused devices:
root@sysresccd /root % mdadm --stop /dev/md3
mdadm: stopped /dev/md3
root@sysresccd /root % mkfs.btrfs -f -d raid5 /dev/sda3 /dev/sdb3 /dev/sdc3

WARNING! - Btrfs v3.12 IS EXPERIMENTAL
WARNING! - see http://btrfs.wiki.kernel.org before using

Turning ON incompat feature 'extref': increased hardlink limit per file to 65536Turning ON incompat feature 'raid56': raid56 extended format
adding device /dev/sdb3 id 2
adding device /dev/sdc3 id 3
fs created label (null) on /dev/sda3
nodesize 16384 leafsize 16384 sectorsize 4096 size 2.72TiB
Btrfs v3.12
root@sysresccd /root % mkfs.btrfs -f -O ^extref -d raid5 /dev/sda3 /dev/sdb3 /dev/sdc3

WARNING! - Btrfs v3.12 IS EXPERIMENTAL
WARNING! - see http://btrfs.wiki.kernel.org before using

Turning ON incompat feature 'raid56': raid56 extended format
adding device /dev/sdb3 id 2
adding device /dev/sdc3 id 3
fs created label (null) on /dev/sda3
nodesize 16384 leafsize 16384 sectorsize 4096 size 2.72TiB
Btrfs v3.12

When creating the btrfs volume for root, I turned off the extra hardlink feature with -O ^extref, and I ended up creating the /boot volume with

mkfs.btrfs -f /dev/sda1 /dev/sdb1 /dev/sdc1

to avoid the error. There are other options for creating a btrfs volume, such as specifying raid levels for data and metadata.

I mounted the btrfs volumes with -o compress=zlib during the install. To keep the compression when files are overwritten, these options must be included in /etc/fstab.

/dev/sda1               /boot           btrfs           compress=zlib,noauto,noatime    0 0
/dev/sda3               /               btrfs           compress=zlib,noatime  0 0
/dev/sda2               none            swap            sw              0 0
/dev/sdb2               none            swap            sw              0 0
/dev/sdc2               none            swap            sw              0 0

When compiling the kernel, RAID and LVM are not necessary since they are included in btrfs. LVM capabilities, such as growing a volume, are also available.
I used dracut to generate an initramfs that supports btrfs RAID boot with modifications to the configuration file /etc/dracut.conf.d.

# PUT YOUR CONFIG HERE OR IN separate files named *.conf
# in /etc/dracut.conf.d
# SEE man dracut.conf(5)

# Sample dracut config file

#logfile=/var/log/dracut.log
#fileloglvl=6

# Exact list of dracut modules to use.  Modules not listed here are not going
# to be included.  If you only want to add some optional modules use
# add_dracutmodules option instead.
#dracutmodules+=""

# dracut modules to omit
#omit_dracutmodules+=""

# dracut modules to add to the default
add_dracutmodules+="btrfs"

# additional kernel modules to the default
#add_drivers+=""

# list of kernel filesystem modules to be included in the generic initramfs
filesystems+="btrfs"

# build initrd only to boot current hardware
#hostonly="yes"
#

# install local /etc/mdadm.conf
mdadmconf="no"

# install local /etc/lvm/lvm.conf
lvmconf="no"

# A list of fsck tools to install. If it's not specified, module's hardcoded
# default is used, currently: "umount mount /sbin/fsck* xfs_db xfs_check
# xfs_repair e2fsck jfs_fsck reiserfsck btrfsck". The installation is
# opportunistic, so non-existing tools are just ignored.
#fscks=""

# inhibit installation of any fsck tools
nofscks="yes"

# mount / and /usr read-only by default
#ro_mnt="no"

# set the directory for temporary files
# default: /var/tmp
#tmpdir=/tmp
use_fstab="yes"

I then ran the command dracut --hostonly --force 'initramfs-genkernel-x86_64-3.12.13-gentoo' 3.12.13-gentoo which overwrote the file /boot/initramfs-genkernel-x86_64-3.12.13-gentoo.
No responses yet

Gentoo Oracle JDK on ARM

Mar 19 2014 Published by under Linux

Installing a JDK on ARM has several challenges. First, there is no binary icedtea for ARM. Second, building icedtea generates circular build time dependencies.
On my first attempt, I just ran the following commands:

emerge --autounmask-write virtual/jdk
dispatch-conf
emerge virtual/jdk

However, it soon met an error:

(controller) sabre2 ~ # cat /var/tmp/portage/dev-java/icedtea-bin-6.1.12.6-r1/temp/build.log
 * Package:    dev-java/icedtea-bin-6.1.12.6-r1
 * Repository: gentoo
 * Maintainer: java@gentoo.org
 * USE:        alsa arm elibc_glibc kernel_linux userland_GNU
 * FEATURES:   preserve-libs sandbox userpriv usersandbox
>>> Unpacking source...
 * ERROR: dev-java/icedtea-bin-6.1.12.6-r1::gentoo failed (unpack phase):
 *   Nothing passed to the 'unpack' command
 *
 * Call stack:
 *          ebuild.sh, line   93:  Called src_unpack
 *        environment, line 2546:  Called unpack
 *   phase-helpers.sh, line  291:  Called die
 * The specific snippet of code:
 *      [ -z "$*" ] && die "Nothing passed to the 'unpack' command"
 *
 * If you need support, post the output of `emerge --info '=dev-java/icedtea-bin-6.1.12.6-r1::gentoo'`,
 * the complete build log and the output of `emerge -pqv '=dev-java/icedtea-bin-6.1.12.6-r1::gentoo'`.
 * The complete build log is located at '/var/tmp/portage/dev-java/icedtea-bin-6.1.12.6-r1/temp/build.log'.
 * The ebuild environment file is located at '/var/tmp/portage/dev-java/icedtea-bin-6.1.12.6-r1/temp/environment'.
 * Working directory: '/var/tmp/portage/dev-java/icedtea-bin-6.1.12.6-r1/work'
 * S: '/var/tmp/portage/dev-java/icedtea-bin-6.1.12.6-r1/work/icedtea-bin-6.1.12.6'

Later, when I checked on gentoo-packages, it didn’t have an arm ebuild. Oracle has hardfloat and softfloat binary JDKs for ARM, so I went on to install them. They can be used to bootstrap an icedtea build.

# emerge -av dev-java/oracle-jdk-bin

 * IMPORTANT: 1 news items need reading for repository 'gentoo'.
 * Use eselect news to read news items.

 * Last emerge --sync was 92d 19h 31m 27s ago.

These are the packages that would be merged, in order:

Calculating dependencies... done!
[ebuild  N     ] media-fonts/dejavu-2.33  USE="-X -fontforge" 4,767 kB
[ebuild  N     ] media-libs/freetype-2.4.11:2  USE="bindist bzip2 -X -auto-hinter -debug -doc -fontforge (-infinality) -static-libs -utils" 1,510 kB
[ebuild  N     ] virtual/ttf-fonts-1  0 kB
[ebuild  N     ] media-libs/fontconfig-2.10.92:1.0  USE="-doc -static-libs" 1,490 kB
[ebuild  N     ] app-admin/eselect-fontconfig-1.0  0 kB
[ebuild  N F  *] dev-java/oracle-jdk-bin-1.7.0.40:1.7  USE="fontconfig -X -alsa
-derby -doc -examples -jce -nsplugin -pax_kernel -source" 138,494 kB

Total: 6 packages (6 new), Size of downloads: 146,260 kB
Fetch Restriction: 1 package (1 unsatisfied)

Fetch instructions for dev-java/oracle-jdk-bin-1.7.0.40:
 *
 * Oracle requires you to download the needed files manually after
 * accepting their license through a javascript capable web browser.
 *
 * Download the following files:
 *   jdk-7u40-linux-arm-vfp-sflt.tar.gz
 *   jdk-7u40-linux-arm-vfp-hflt.tar.gz
 * at 'http://www.oracle.com/technetwork/java/javase/downloads/jdk7-downloads-1880260.html'
 * and move them to '/distfiles'
 *

The following keyword changes are necessary to proceed:
 (see "package.accept_keywords" in the portage(5) man page for more details)
# required by dev-java/oracle-jdk-bin (argument)
=dev-java/oracle-jdk-bin-1.7.0.40 **

The following license changes are necessary to proceed:
 (see "package.license" in the portage(5) man page for more details)
# required by dev-java/oracle-jdk-bin (argument)
>=dev-java/oracle-jdk-bin-1.7.0.40 Oracle-BCLA-JavaSE

NOTE: The --autounmask-keep-masks option will prevent emerge
      from creating package.unmask or ** keyword changes.

Use --autounmask-write to write changes to config files (honoring
CONFIG_PROTECT). Carefully examine the list of proposed changes,
paying special attention to mask or keyword changes that may expose
experimental or unstable packages.

You may not have a browser installed on your ARM board, so I suggest just uploading the Oracle tarballs to a server and using wget to download them.
To fix the control panel error when you don’t have a desktop environment installed, you need to remove lines from the ebuild and digest it.

vim /usr/portage/dev-java/oracle-jdk-bin/oracle-jdk-bin-1.7.0.40.ebuild

These lines need to be removed:

    newicon jre/lib/desktop/icons/hicolor/48x48/apps/sun-jcontrol.png \
        sun-jcontrol-${PN}-${SLOT}.png || die
    sed -e "s#Name=.*#Name=Java Control Panel for Oracle JDK ${SLOT}#" \
        -e "s#Exec=.*#Exec=/opt/${P}/jre/bin/jcontrol#" \
        -e "s#Icon=.*#Icon=sun-jcontrol-${PN}-${SLOT}#" \
        -e "s#Application;##" \
        -e "/Encoding/d" \
        jre/lib/desktop/applications/sun_java.desktop \
        > "${T}"/jcontrol-${PN}-${SLOT}.desktop || die
    domenu "${T}"/jcontrol-${PN}-${SLOT}.desktop

Once removed, generate the manifest for it.

ebuild /usr/portage/dev-java/oracle-jdk-bin/oracle-jdk-bin-1.7.0.40.ebuild digest

If you run emerge dev-java/oracle-jdk-bin, it will succeed.

No responses yet

Gentoo on SABRE Lite

Jan 23 2014 Published by under Linux

I recently received several SABRE Lite BD-SL-i.MX6 boards for running ARM benchmarks on DataMill. To install Gentoo on it, you need a USB-to-serial cable converter. It came with a 4GB SD card, which is large enough to get you started.
Overview of the installation:

  • Reset board and format SD card (optional)
  • Compile kernel with btrfs support (optional)
  • Copy boot script and kernel
  • Extract stage3 and portage snapshot
  • Configure the install
  • Backup and clone (optional)

Reset board and format SD card

When I first tried to boot images extracted to the SD card on the board, it always got stuck at the U-Boot prompt. It turned out that there were environment variables left over from previous uses for these boards. Here is the way to reset board variables:

U-Boot > run clearenv
U-Boot > reset

After I managed to boot Linux images on it, I went onto formatting the card for a Gentoo install. I used sfdisk so that formatting can be scripted with a file which I saved as mmc_partitions:

# partition table of /dev/sdd
unit: sectors

/dev/sdd1 : start=     2048, size=   102400, Id=83
/dev/sdd2 : start=   104448, size=  7669760, Id=83
/dev/sdd3 : start=        0, size=        0, Id= 0
/dev/sdd4 : start=        0, size=        0, Id= 0

I formatted the second partition as btrfs so that compression could be used on the small SD card. You may want to format it as ext3 to save time. If you have problems getting it to boot, check to make sure your btrfs-progs are not newer than the btrfs version the kernel is built to support. sys-fs/btrfs-progs-0.20_rc1 worked for the January 2014 kernel source.

# sfdisk -f /dev/sdd < mmc_partitions
# mkfs.btrfs -f /dev/sdd2 && mkfs.ext2 /dev/sdd1

Compile kernel with btrfs support

The git tree for the kernel is available at https://github.com/boundarydevices/linux-imx6/. There are two main branches, one for Android and one for non-Android. Use the most recent one for non-Android.

# wget https://github.com/boundarydevices/linux-imx6/archive/boundary-imx_3.0.35_4.1.0.zip
# unzip boundary-imx_3.0.35_4.1.0.zip
# cd linux-imx6-boundary-imx_3.0.35_4.0.0
# make ARCH=arm imx6_defconfig
# vim .config

Make the following changes to the kernel config:

CONFIG_DEVTMPFS=y
CONFIG_BTRFS_FS=y
CONFIG_CRYPTO_CRC32C=y
CONFIG_LIBCRC32C=y

Gentoo requires a devtmpfs filesystem to mount at /dev while selecting btrfs also selects LIBCRC32C. The CRC32c CRC algorithm is used by btrfs for checksums.
Now cross compile the kernel

# make -j9 ARCH=arm CROSS_COMPILE=armv7a-unknown-linux-gnueabi- uImage

Copy boot script and kernel

Download 6x_bootscript-20121110 available from a blog post and rename it 6x_bootscript. Get the kernel from one of the i.MX6 builds if you decided to skip building it.

# mount -o compress=zlib /dev/sdd2 /mnt/p1 && mkdir /mnt/p1/boot && mount /dev/sdd1 /mnt/p1/boot
# cp 6x_bootscript /mnt/p1/boot
# cp uImage /mnt/p1/boot

uImage is located in /usr/src/linux/arch/arm/boot if you compiled the kernel.

Extract stage3 and portage snapshot

Download the latest stage3 tarball and extract it

tar xjpf stage3-armv7a*.tar.bz2 -C /mnt/p1

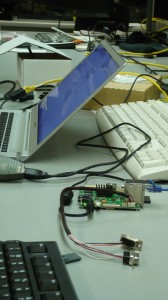
BD-SL-i.MX6 with serial cable
If you get errors trying to run emerge --sync, it is because downloading the portage tree is not optional unlike other guides indicate. Simply download it from your nearest mirror and extract it

# tar xjpf portage-latest.tar.bz2 -C /mnt/p1/usr

Configure the install

If you compiled the kernel with btrfs, edit /mnt/p1/etc/fstab file so that zlib compression is enabled

/dev/mmcblk0p1          /boot           ext2            noatime         0 1
/dev/mmcblk0p2          /               btrfs            noatime,compress=zlib
       0 1

Set kernel boot argument in /mnt/p1/etc/inittab. Change the console= argument to ttymxc1. eg "$bootargs console=ttymxc1,115200 vmalloc=400M consoleblank=0 rootwait"
The rest of the process is the same as for other ARM boards, such as the Trimslice. The guide for it is available at http://dev.gentoo.org/~armin76/arm/trimslice/install.xml.
4 SABRE Lite i.mx6 Development Boards on the benchmark rack

Backup and clone

First make the backup in a folder

cd /backups
tar -cvpzf backup.tar.gz /mnt/p1/

After unmounting the SD card and testing it on the device, put in a new one and clone it with the following commands

sfdisk -f /dev/sdd < mmc_partitions
mkfs.btrfs -f /dev/sdd2 && mkfs.ext2 -FF /dev/sdd1
mount -o compress=zlib /dev/sdd2 /mnt/p1 && mkdir /mnt/p1/boot && mount /dev/sdd1 /mnt/p1/boot
tar xzpf backup.tar.gz -C /mnt/p1
vim /mnt/p1/etc/conf.d/hostname

umount /mnt/p1/boot && umount /mnt/p1

The Funtoo ARM Guide has up to date sections on setting the root password and using swclock. If you decide to use swclock, update the last shutdown time to set the clock with touch /tmp/mnt/p1/lib/rc/cache/shutdowntime after extracting the tarball.

No responses yet

How to Clone a Gentoo Workstation

Nov 22 2013 Published by under Linux

Installing Gentoo Linux across all Pentium 4 machines for DataMill was an easy process. I copied an existing installation across hard drives. While installing Gentoo on the source machine, I had -march=pentium4 in make.conf while I would recommend i686 or x86_64 for a generic install that can be copied over a large number of machines. I follow the same steps as http://www.gentoo-wiki.info/HOWTO_Clone_a_Gentoo_Server_or_Workstation, with slight modifications.
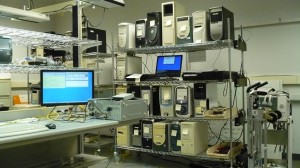
DataMill benchmark cluster
On the source machine, I boot up the System Rescue CD and resize the last partition of the install to fit the hard drive size. I also have netcat compiled and uploaded to my site. I run

ifconfig -a

to find out its ip address. Before I start the cloning process, I also change the hostname.

mount /dev/sda3 /mnt/gentoo #sda4 is the partition for /
vim /mnt/gentoo/etc/conf.d/hostname
umount /mnt/gentoo
dd if=/dev/sda conv=sync,noerror bs=1024 count=30000000 | ./nc -l 0 -p 5000

On the destination machine, I boot the Gentoo Live CD, download netcat, and listen to port 5000.

net-setup eth0 #your network interface may vary
wget http://yourdomain.com/linux/nc
chmod +x nc
./nc 10.10.10.16 5000 | dd of=/dev/sda bs=1024

Replace the IP address with the one you obtained from the source machine.
Resize partition with System Rescue CD

No responses yet

Linux kernel config to fix high pitch noise from CPU

Sep 30 2013 Published by under Linux

On one of the computers I was using, I started noticing a high pitched noise after I moved into a quieter room. At first, I thought I heard it after I turned off the computer. It must have been one of those ghosts. I haven’t bothered with it until today because I rarely turn off my computer. Also, it didn’t have support for suspend compiled into the kernel, which often requires a lot of modules to be built. I am using a minimal kernel seed from http://kernel-seeds.org/, so I didn’t bother adding those modules.
You can tell the high pitched noise is coming from your CPU if running a computationally intensive process suddenly silences it. First, I tried adding more CPU power management and adjusting fan speeds in the BIOS. They are related. If the CPU is using less power and running cooler, the fan also spins slower with less noise. I didn’t expect Intel’s market dominating CPU to be producing the noise. However, just like Windows or any market leader, there’s not enough competition for such things to be a threat. Next, typing a simple search query for “linux kernel config high pitch” lead me to http://www.thinkwiki.org/wiki/Problem_with_high_pitch_noises, and I tried the first solution by recompiling my kernel. I had a similar problem with my old Dell laptop when it went to sleep. I ended up never using sleep so that I could sleep at night.
The solution is to set CONFIG_ACPI_PROCESSOR=n under ACPI options. If you’re new to compiling a kernel, a good guide is Linux Sea.

— ACPI (Advanced Configuration and Power Interface Support)
[*] Deprecated /proc/acpi files
[*] Deprecated power /proc/acpi directories
< > ACPI 4.0 power meter
[*] Future power /sys interface
[*] Deprecated /proc/acpi/event support
<*> AC Adapter
<*> Battery
<*> Button
<*> Video
<*> Fan
< > Processor
<*> Thermal Zone
[ ] Debug Statements
< > PCI slot detection driver
< > Smart Battery System

No responses yet

e17 Menu Icons

Aug 27 2013 Published by under Linux

After installing e17 on Gentoo and a few applications, I noticed that some of the applications in the menu had icons while others did not. The same icons were missing in the IBar and other places. At first, I checked the wiki page on e17, it suggested to install evas_generic_loaders with SVG support. Contrary to what it suggests, evas_generic_loaders does not affect menu icon display it is used for tooltip previews in the file browser.
The way to set is to navigate to Settings -> All -> Look -> Application Theme and open the Icons tab. Once I selected Gnome, all the icons appeared. “Enable icon theme for applications” was already checked by default. If you do not see Gnome icons in the Icons tab, make sure you have installed x11-themes/gnome-icon-theme if you’re using Gentoo.

No responses yet

Enabling GCC Graphite and LTO on Gentoo

Jul 08 2013 Published by under Linux

In this article, we will be enabling the GCC options marked with “To use this code transformation, GCC has to be configured with –with-ppl and –with-cloog to enable the Graphite loop transformation infrastructure. “, referred to as graphite. In addition, Link Time Optimization(LTO) refers to the options -flto and -fuse-linker-plugin. -fuse-linker-plugin tells GCC to use an external linker and -flto defers link time optimizations until the final link step so that the optimizer can work across the whole program rather than on individual object files. OpenMP is for parallelization and I save it for another article since I do not have benchmarks to show that it improves performance.
To enable graphite, LTO, and OpenMP it is recommended to first install the latest version of GCC. More recent versions of GCC contain bug fixes for features we are about to enable. The GCC upgrade process is detailed in the guide http://www.gentoo.org/doc/en/gcc-upgrading.xml.

After upgrading GCC, we start enabling the newer features. The steps follow the guidelines on the Gentoo wiki roughly. However,  it is unnecessary to rebuild everything after upgrading GCC as explained in the official GCC upgrade guide. libtool allows packages to be built against shared libraries without rebuilding every time the toolchain is upgraded.
Before adding the graphite USE flag, it is essential to build cloog

emerge dev-libs/cloog dev-libs/cloog-ppl

Then add graphite to CFLAGS and enable graphite USE flags

GRAPHITE="-floop-interchange -ftree-loop-distribution -floop-strip-mine -floop-block"
CFLAGS="-flto=8 ${GRAPHITE} -ftree-vectorize"
CXXFLAGS="${CFLAGS}"
LDFLAGS="${CFLAGS} -fuse-linker-plugin"
# GCC >= 4.8.2 requires the lto flag
USE="graphite lto"

These flags can be appended to the ones you’re already using, although certain flags may conflict with the graphite optimizations. Since graphite flags such as -ftree-loop-distribution is intended to enable further vectorization, I also enabled the -ftree-vectorize flag. The -fuse-linker-plugin is a linker flag while -flto=n turns on the standard link-time optimizer. I set n to 8 for 8 threads while linking. Another factor that could affect performance is -flto-partition, which sets the partitioning algorithm.
To use the linker plugin with LTO, set the linker to Gold:

binutils-config --linker ld.gold

In addition, before compiling the system it is necessary to build GCC with graphite:

emerge gcc
emerge -e world

Dealing with breakages

Several packages failed to compile with LTO and graphite enabled. These flags can be disabled on a per package basis. First create the files in /etc/portage/env/ called no-lto.conf and no-graphite.conf. In no-graphite.conf, disable your graphite flags:

CFLAGS="${CFLAGS} -fno-loop-interchange -fno-tree-loop-distribution -fno-loop-strip-mine -fno-loop-block"
CXXFLAGS="${CXXFLAGS} -fno-loop-interchange -fno-tree-loop-distribution -fno-loop-strip-mine -fno-loop-block"
LDFLAGS="${LDFLAGS} -fno-loop-interchange -fno-tree-loop-distribution -fno-loop-strip-mine -fno-loop-block"

Similary, disable your LTO flags in no-lto.conf:

CFLAGS="${CFLAGS} -fno-lto -fno-use-linker-plugin"
CXXFLAGS="${CXXFLAGS} -fno-lto -fno-use-linker-plugin"
LDFLAGS="${LDFLAGS} -fno-lto -fno-use-linker-plugin"

Every time a package breaks, add a line to /etc/portage/package.env that either disables graphite or LTO. For example, I made these adjustments:

net-misc/curl no-graphite.conf
media-libs/mesa no-graphite.conf
sys-apps/findutils no-lto.conf
sys-apps/gawk no-lto.conf

After adding a line you can resume the system rebuild with emerge --resume.

Notes

Before re-compiling your system, setting moving /var/tmp to RAM speeds things up. The Sabayon wiki has an article on performance, just make sure you reboot after changing /etc/fstab.

After building the current version of PPL, this message is displayed for upgrades:

* After an upgrade of PPL it is important that you rebuild
* dev-libs/cloog-ppl.
*
* If you use gcc-config to switch to an older compiler version than
* the one PPL was built with, PPL must be rebuilt with that version.
*
* In both cases failure to do this will get you this error when
* graphite flags are used:
*
* sorry, unimplemented: Graphite loop optimizations cannot be used

2 responses so far

Phoronix GCC Graphite and LTO Benchmarks

Jul 08 2013 Published by under Linux

GCC Graphite and Link Time Optimization are new features that many Gentoo users do not enable because they have not been proven to improve performance. I recently did a fresh install of Funtoo optimized for Core i7 and a recompile of the system to run Phoronix benchmarks. Before we look at the benchmarks, it is imperative to note that Phoronix is not intended to test the performance of programs compiled with certain sets of GCC flags. The test suite documentation states,

… for the software being tested that may be installed already on the system by the user, the Phoronix Test Suite will ignore those installations. The Phoronix Test Suite installs all tests within its configured environment to improve the reliability of the testing process.

which means the test suite disables system-wide GCC flags for test packages. So out of the tests I ran, only the ones that tested the packages compiled with Graphite and LTO enabled are worth looking at, and these are PyBench and gzip compression. Of the other tests, video and audio encoding as well as the lzma compression are built using the make command, which bypasses the Gentoo build system. If we look at the individual test packages, the lzma package downloads the lzma source

<?xml version="1.0"?>
<!--Phoronix Test Suite v3.0.0a3 (Iveland) [ http://www.phoronix-test-suite.com/ ]-->
<PhoronixTestSuite>
  <Downloads>
    <Package>
      <URL>http://mirror.internode.on.net/pub/gentoo-portage/distfiles/lzma-4.32.6.tar.gz, http://buildroot.uclibc.org/downloads/sources/lzma-4.32.6.tar.gz</URL>
      <MD5>211d6207fdd7f20eaaae1bbdeb357d3a</MD5>
      <FileSize>478661</FileSize>
    </Package>
  </Downloads>
</PhoronixTestSuite>

and builds it without using Gentoo’s package manager. That means it doesn’t use the GCC optimization flags.

#!/bin/sh

mkdir $HOME/lzma_

tar -zxvf lzma-4.32.6.tar.gz
cd lzma-4.32.6
./configure --prefix=$HOME/lzma_
make -j $NUM_CPU_JOBS
echo $? > ~/install-exit-status
make install
cd ..
rm -rf lzma-4.32.6

cat > compress-lzma <<EOT
#!/bin/sh
./lzma_/bin/lzma -q -c ./compressfile > /dev/null 2>&1
EOT

chmod +x compress-lzma

On the other hand, the gzip package doesn’t require any downloads and uses the system’s gzip

#!/bin/sh

cat > compress-gzip <<EOT
#!/bin/sh
cat compressfile | gzip -c > /dev/null 2>&1
EOT

chmod +x compress-gzip

At last, we are ready to understand the results, which do indicate that these new GCC features improve performance.
http://openbenchmarking.org/result/1307063-UT-GCCOPTIMI03

No responses yet

Upgrading Sabayon and Building Chrome

Apr 26 2013 Published by under Linux

One advantage of using Sabayon is that you can compile programs to be optimized for your CPU architecture. There are many optimization options and I use -march=native -O3 -pipe -fomit-frame-pointer -ftracer -floop-interchange -floop-block -ftree-loop-distribution -freorder-blocks-and-partition. Chrome on Linux is the fastest browser for sites that you visit often, as they are cached. Furthermore, you can boost Chrome performance beyond the benchmarks.
I follow a few simple steps for upgrading Sabayon:

  1. equo update
  2. equo install entropy equo
  3. equo repo mirrorsort sabayon-weekly
  4. equo upgrade
  5. equo conf update

Wolfden has a nice article explaining these steps. To upgrade Chrome, I use the Portage package manager:

  1. emerge –sync
  2. layman -S
  3. equo install sys-devel/gcc-[version]
  4. gcc-config -c
  5. equo install www-client/chromium-[version]
  6. emerge -av –oneshot –nodeps =www-client/chromium-[version]

There were errors coming from different packages when I tried to compile them without steps 3-5, such as configure: error: C compiler cannot create executables and gcc-config: error: could not run/locate ‘g++’. Installing the gcc version listed in gcc-config -c fixed the problem.

No responses yet

Next »